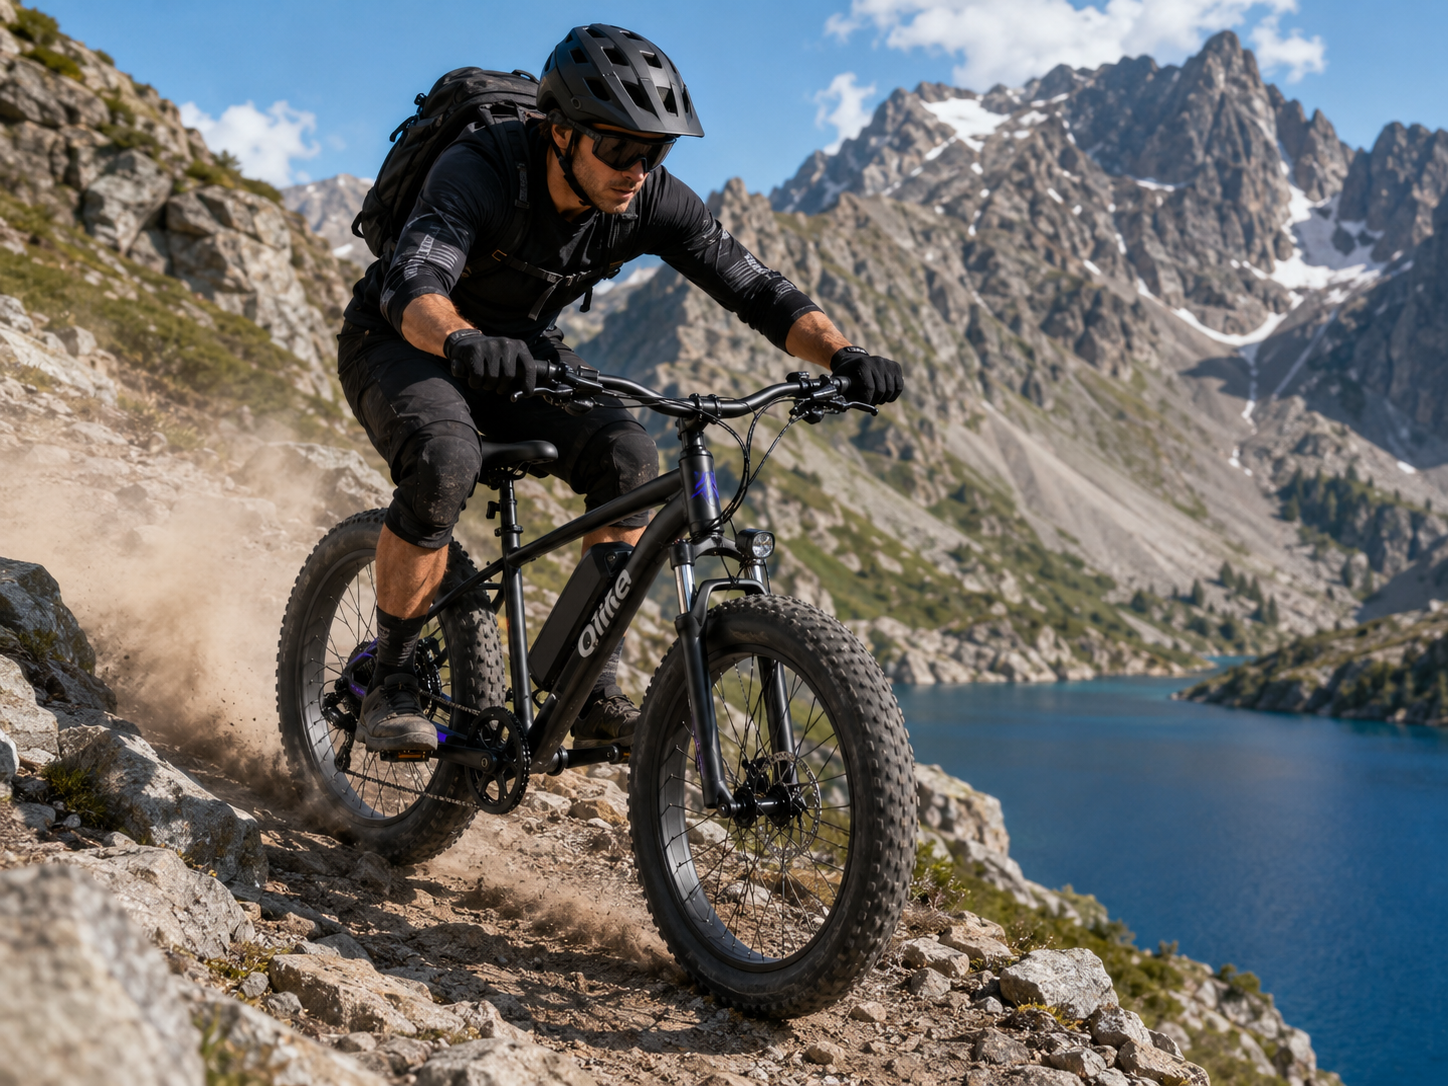
The right fat tire ebike tire pressure is the lowest pressure that still keeps the tire stable, protects the rim, and gives you predictable steering. I treat the numbers below as a starting line, not a dare. For a 4-inch tire, a useful test window is often around 12-18 PSI on pavement, 8-14 PSI on mixed paths, and 5-10 PSI on soft snow or sand. Those are starting points, not universal prescriptions. In other words, this is also a practical guide to fat bike tire pressure, with the motor and extra bike weight taken into account.

Before you touch the pump, read the pressure information on the tire sidewall and in your bike manual. The manufacturer's minimum and maximum tire pressure are the hard boundaries. If your tire says 5-15 PSI, the 15 PSI maximum wins over any chart on the internet. A fat tire is supposed to look a little soft. It is not supposed to fold in a corner or bang the rim over every pothole.
Fat Tire E-Bike Pressure: Safe Starting Guidance
Use the table below as a conservative worksheet for a first ride. It assumes a normal tube or approved tubeless setup, a sound rim, and a rider who is staying within the bike's payload rating. Measure pressure cold, with the same gauge each time.
Provisional fat tire ebike PSI starting bands
| Tire width | Pavement and smooth paths | Mixed paths and hardpack | Soft sand or packed snow |
|---|---|---|---|
| 3.0 inches | 16-22 PSI | 12-18 PSI | 8-12 PSI |
| 4.0 inches | 12-18 PSI | 8-14 PSI | 5-10 PSI |
| 4.8 inches | 10-16 PSI | 6-12 PSI | 4-8 PSI |
The lower numbers improve float and traction. The higher numbers reduce tire squirm, rolling resistance, and the chance of a rim strike. If your sidewall range is narrower, use that range and ignore the part of this table that falls outside it. The terrain table below narrows these bands for a typical 4-inch tire, and the load matrix later shifts the starting point again. Some 3.8-4.0-inch fat-bike tires are published with a 5-15 PSI operating range, which is a good reminder that tire construction matters as much as width. See the Maxxis bicycle tire technology chart for an example of how much a manufacturer's range can vary.

For Qlife's fat-tire models, the 4.0-inch row is the useful place to begin. The Racer 20x4.0 Fat Tire 2.0, Racer Plus 26x4.0 Fat Tire 2.0, and Racer Max Dual Motor all use 4-inch tires. Start inside the sidewall range for your specific tire, then tune for the surface and load.
What Changes the Correct Tire Pressure?
There is no single ebike tire pressure by weight number because the tire is carrying a system, not just a rider. The bike, battery, rack, backpack, tools, groceries, and anything else on board all change the load on the contact patch.
Tire width and casing
Wider tires hold more air volume, so they can support the same load at a lower PSI. A stiff, reinforced casing may need a different pressure from a supple trail casing in the same size. Tread also matters. A tall, open tread can feel vague on pavement at the same pressure that feels planted in loose dirt.
Rider and cargo load
More load means more tire deflection. That can be useful for traction until the sidewall starts to roll, the steering goes vague, or the rim begins taking hits. Add pressure in small steps as the load increases. Do not use pressure as a way to exceed the bike's rated payload.
Qlife lists a 350-pound total payload for the Racer 20x4.0 Fat Tire 2.0 and Racer Plus 26x4.0 Fat Tire 2.0. The Racer Max listing shows a 400-pound payload. Treat those figures as load limits, not pressure targets, and check the current manual for the exact configuration you own.
Terrain and speed
Pavement rewards a rounder tire and lower rolling resistance, so most riders prefer the upper half of their safe range. Sand and snow reward a longer contact patch, so pressure comes down until the tire floats without the rim touching. Faster riding, hard braking, and rocky descents all justify a little more pressure than slow cruising on a smooth path.
Tube, tubeless, and rim setup
An inner tube needs enough pressure to reduce pinch-flat risk when the tire bottoms out. A tubeless tire can sometimes run lower, but only when the tire, rim, bead, sealant, and installation are compatible. Do not assume a Qlife bike is tubeless-ready unless the model documentation and the wheel components say so.
Temperature and the gauge
Check cold pressure before the ride. Air pressure changes as the tire warms in the sun or cools overnight, and a different pump gauge can easily make a small adjustment look bigger than it is. Use one reliable low-pressure gauge and write down the reading. The number on the pump is only useful if it is repeatable.
Pressure by Terrain
For a 4-inch tire, use this as a terrain map rather than a rulebook. Stay inside the printed sidewall range and change only 1-2 PSI at a time.
| Surface | Useful starting band | What you are balancing |
|---|---|---|
| Smooth pavement | 14-18 PSI | Rolling resistance, battery use, and straight-line stability |
| Broken pavement and curb cuts | 12-16 PSI | Comfort without rim strikes |
| Gravel and hardpack | 10-14 PSI | Traction, steering, and vibration control |
| Loose dirt and roots | 8-12 PSI | Grip and sidewall support in corners |
| Soft sand | 4-8 PSI | Float and forward traction; stop if the rim touches |
| Packed snow | 5-10 PSI | Float, braking grip, and tracking |
| Wet roots and rocks | 7-11 PSI | Grip without a tire that folds under braking |
Fat tire pressure for pavement
When I set up a fat tire e-bike for pavement, I start near the upper half of the safe range. If the bike feels slow to accelerate, wanders in a straight line, or uses noticeably more battery on a familiar route, add 1-2 PSI. If it chatters over every seam and feels harsh through the bars, remove 1 PSI and try again. The saddle is not a suspension system, no matter what the marketing copy says.
Fat tire pressure for sand
Lower pressure helps the tire spread its footprint instead of cutting down into the sand. Use the firmest pressure that still lets the tire float. Deep, loose sand may need the low end of the range, while damp beach sand can support a little more. Keep your speed smooth. A heavy throttle hand can dig a perfectly adjusted tire into a hole in seconds.
Fat tire pressure for snow
Packed snow usually needs less pressure than pavement but more than very soft sand. If the front tire wanders, add 1 PSI before lowering it further. If the rear spins under motor assist, reduce pressure slightly or use a gentler assist level. Studded tires, frozen ruts, and icy corners are separate problems. Pressure alone does not create grip on ice.
Front vs. Rear Tire Pressure
The rear tire normally carries more weight because the rider sits behind the center of the bike and cargo often lives on a rear rack. That is why front rear pressure is usually not identical.
I usually begin with the same cold pressure in both tires if I do not know the load split. Then I use handling feedback. If the rear squirm starts first, add 1 PSI to the rear. If the front feels vague or pushes wide in a turn, add 1 PSI to the front instead. A rear cargo load may justify a 1-2 PSI difference, but there is no magic rear number that works for every frame, rim, and casing.
On a Qlife Racer with a rear rack, put the heaviest item low and close to the rack supports. The Racer 20x4.0 Fat Tire 2.0 and Racer Plus list a 120-pound rear-rack capacity, but the rack rating does not replace the bike's total payload limit. A full rack can change rear tire feel even when the scale says you are still within the bike's limit.
Rider + Cargo Starting-Pressure Matrix
This pressure matrix is a provisional worksheet for a 4-inch tire. It uses rider plus cargo weight, not the bike's published payload rating. Do not extrapolate beyond the table or use it to carry more than the bike allows.
| Rider + cargo | Pavement | Mixed or hardpack | Loose dirt, sand, or snow |
|---|---|---|---|
| Under 180 lb | 12 PSI | 9 PSI | 6 PSI |
| 180-240 lb | 13 PSI | 10 PSI | 7 PSI |
| 241-300 lb | 14 PSI | 11 PSI | 8 PSI |
| 301-350 lb | 15 PSI | 12 PSI | 9 PSI |
| 351-400 lb | 15 PSI, only if allowed | 13 PSI, only if allowed | 10 PSI, only if allowed |
| Over 400 lb | Use the tire and bike manual | Use the tire and bike manual | Use the tire and bike manual |
Use these adjustments after choosing a cell:
- Use the 3-inch row instead of applying a fixed offset. Smaller air volume usually asks for more PSI at the same load, but casing and rim limits decide how much.
- Use the 4.8-inch row instead of assuming a fixed reduction. A larger casing can run lower, but only while the bead stays stable and the sidewall stays supported.
- Add 1 PSI to the rear when a rear cargo load makes the sidewall feel soft or the steering vague.
- If the tire maker approves a tubeless setup, test any pressure reduction in 1 PSI steps after a bead-stability check.
- Stop lowering pressure if you hear rim strikes, feel the tire roll off-center, see a crease at the sidewall, or notice sudden air loss.
The point of the matrix is repeatability. It gives you a sensible first setting so you can judge tire deflection, steering, comfort, rim protection, and battery use without changing five things at once.
The Three-Run Pressure Tuning Protocol
You can find your personal pressure sweet spot in one short, controlled session. I like this method because it gives the tire one job at a time: carry the load, hold a line, and protect the rim.
- Record the setup. Write down tire size and model, tube or tubeless status, rim width if known, rider plus cargo weight, outdoor temperature, and the gauge you are using.
- Choose a repeatable route. Use the same loop with a little pavement and the surface you actually ride. Keep assist level, speed, and cargo arrangement as consistent as possible.
- Set the baseline cold. Use the matrix or the terrain table, then write down front and rear PSI before riding.
- Run the baseline. Pay attention to steering effort, cornering support, comfort, tire deflection, wheel spin, rim events, and battery percentage used.
- Run high. Add 2 PSI to the axle that felt vague or draggy. Ride the same loop. Note whether the bike rolls easier, chatters more, or loses grip.
- Run low. Return to baseline, then remove 1-2 PSI. Only do this if the baseline produced no rim strikes, sidewall roll, bead movement, or sudden pressure loss.
- Keep the winner. Choose the lowest setting that remains stable and predictable. Recheck it cold before the next ride because a warm post-ride reading is not your starting pressure.
If your display does not show watt-hours, use battery percentage as a rough comparison rather than pretending it is a laboratory measurement. Wind, temperature, assist changes, and stop-and-go riding can easily swamp a small pressure difference.
Symptoms of Pressure That Is Too Low or Too High
| What you feel or see | Likely direction | First action | Stop and inspect when... |
|---|---|---|---|
| Sidewall squirm in turns | Too low | Add 1-2 PSI to that tire | The tire rolls onto the rim or the bead moves |
| Rim strikes or pinch flats | Too low | Add 2 PSI and inspect rim and tube | You hear repeated impacts |
| Vague or self-steering front end | Too low, often front | Add 1 PSI to the front | Steering remains unstable after adjustment |
| Harsh bounce and hand fatigue | Too high | Remove 1 PSI if still above the minimum | The tire is already at its minimum |
| Wheel spin on loose ground | Too high or too much throttle | Remove 1 PSI and smooth your inputs | The tire still cannot hold a line |
| Slow pavement speed or battery drain | Too low | Add 1-2 PSI on the road setup | The tire is warm or the route conditions changed |
| Fast center-tread wear | Too high | Remove 1 PSI and check alignment | Wear is uneven or the tire is damaged |
| Bead instability or rapid air loss | Wrong setup or damage | Stop riding and inspect the tire, rim, and valve | Do not continue until the cause is fixed |
Low tire pressure on an e-bike can feel comfortable right up until it does not. The extra motor torque and the bike's higher system weight make rim protection and bead stability especially important.
How and When to Check Pressure
Use a pressure gauge before every ride if you are changing terrain often. At minimum, check before each long ride and whenever the bike has been sitting through a large temperature change. A quick squeeze is not accurate enough for a fat tire.
During the check:
- Look for cuts, exposed casing, embedded glass, and a bent valve stem.
- Confirm the valve cap is present and the valve core is not leaking.
- Compare the gauge reading with the sidewall range and your last note.
- Check the rear tire after loading a rack or pannier. Cargo load changes the rear contact patch more than most riders expect.
- If pressure drops repeatedly, use soapy water around the valve and bead or have a shop inspect the tire. Do not keep adding air to hide a slow leak.
The Schwalbe tire-pressure overview makes the same broad point: wider tires generally use lower pressure, and the right setting depends on the tire and riding system. Your sidewall remains the final authority.
Qlife Models and Pressure Setup
Qlife's fat-tire range makes the width part simple, but the riding use still matters.

- The Racer 20x4.0 Fat Tire 2.0 uses 20x4.0 tires, full suspension, a listed 350-pound payload, and a 120-pound rear-rack capacity. Its smaller wheel can feel nimble at low speed, so avoid dropping pressure until the steering starts to wander.
- The Racer Plus 26x4.0 Fat Tire 2.0 also uses 4-inch tires and lists a 350-pound payload and 120-pound rear-rack capacity. The larger wheel is stable on rough paths, but a loaded rack still increases rear tire deflection.
- The Racer Max Dual Motor uses 26x4.0 tires, hydraulic disc brakes, and a listed 400-pound payload. More motor output does not mean you should run less pressure. It simply makes smooth throttle control more important on loose surfaces.
For help choosing a model before you buy, see Qlife's fat tire e-bike buying guide, fat tire e-bike pros and cons, and guide to fat tire e-bikes for commuting. Pressure is one of the easiest ways to change how any of these bikes feels after it is in your garage.
Frequently Asked Questions
What is the minimum PSI for a fat tire e-bike?
There is no universal minimum PSI. Use the minimum printed on the tire or specified in the manual, then stay high enough to prevent squirm, rim strikes, and bead movement. If you need to go below that range for sand or snow, stop and confirm the tire and rim are designed for it.
What is the maximum tire pressure?
The maximum tire pressure is the ceiling printed on the tire sidewall or listed by the tire maker. It is not automatically the best riding pressure. For pavement, start in the upper half of the safe range and adjust from handling feedback.
What pressure should a 4-inch fat tire use on pavement?
Use the upper half of the tire's approved range. As a provisional starting point, many 4-inch setups land around 14-18 PSI on smooth pavement, but a tire limited to 15 PSI must stay at or below 15 PSI.
What is the best fat tire pressure for sand?
Start around 4-8 PSI for a 4-inch tire if the sidewall and rim allow it. Lower pressure improves float, but stop if the rim touches, the sidewall folds, or the bead loses stability. Smooth power inputs matter as much as PSI.
Should heavier riders use higher pressure?
Usually, yes. Add pressure in 1-2 PSI steps as rider or cargo weight increases, while staying inside the tire and bike limits. The correct change depends on casing, rim, terrain, and front-to-rear load split, so do not apply a fixed PSI increase for every extra pound.
Is tube or tubeless better for low tire pressure?
Neither is automatically better. Tubeless systems can sometimes run lower without pinch flats, but they still need a compatible tire, rim, bead, sealant, and installation. Tubed tires need enough pressure to protect the tube and rim from impacts. Qlife model documentation should be your starting point before any conversion.
Final Takeaway
Set fat tire pressure by the tire's limits, then tune it to the way you actually ride. Start with the 4-inch table, account for rider and cargo weight, give the rear tire a little more support when it is carrying the load, and make one small change at a time. The best setting is the one that keeps the bike planted without feeling dead or harsh.
For more all-terrain setup advice, browse Qlife's best fat tire e-bikes guide and wet-weather riding guidance. Then check your gauge, check the sidewall, and go ride the route you bought the bike for.
Share:
Best Electric Bikes Under $800 for Commuting, Campus, and Errands
Fat Tire vs Regular Tire E-Bikes: Range, Comfort, and Handling