
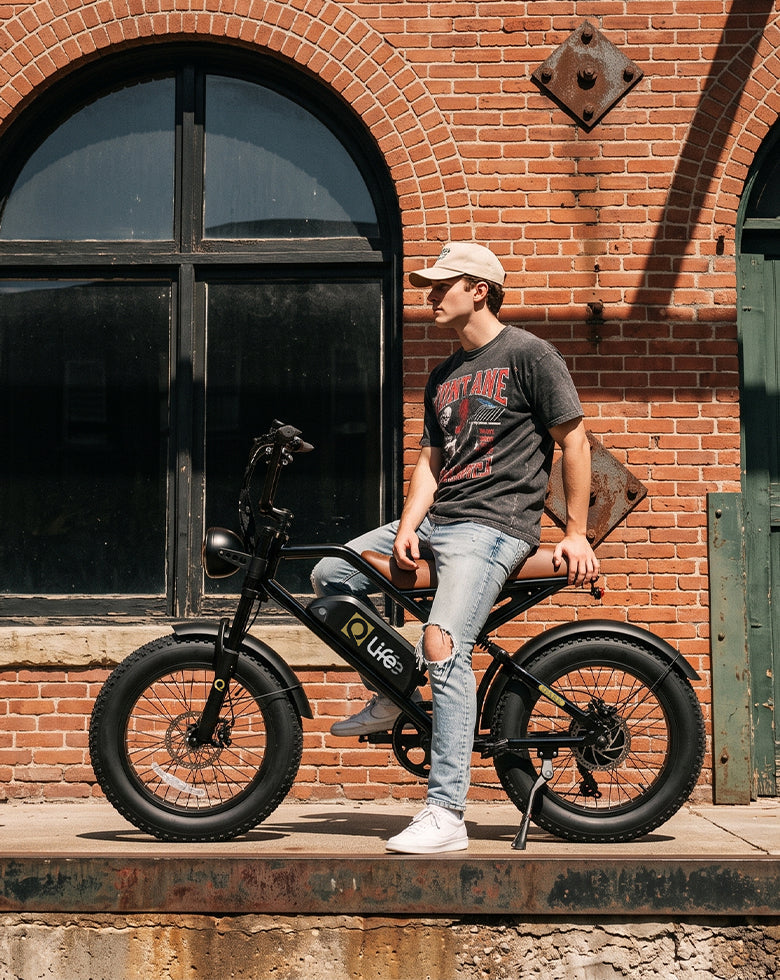
Not every e-bike will be the right fit. A bike might feel too small or too big, the handlebars may be too far away, or the saddle simply might not feel comfortable. Whether it works depends as much on your body as the model itself. How, then, do you choose the right e-bike for your height and weight?
Most e-bike size and weight capacity guides only cover the recommended rider-height range or maximum payload. That doesn’t tell the whole story. You also need to consider your inseam, handlebar reach, mobility, total load, and ability to mount and control the bike.

Below, we answer the main questions and help you choose an e-bike that doesn’t just match your measurements but feels comfortable and manageable to ride.
E-Bike Fit and Capacity: The Short Answer
A suitable e-bike must fit the rider’s height, inseam, reach, and mobility. That means the rider should be able to easily get on the bike, press the brakes, and move the pedals without any discomfort. It doesn’t mean just barely touching the brakes or struggling to stay upright when stopping. It means remaining controllable when mounting, stopping, and turning.
You’ll need to:
1. Measure height and inseam.
2. Check saddle range, frame clearance, and reach.
3. Calculate the complete payload.
4. Confirm mounting and low-speed control.
5. Check storage, lifting, and transport requirements.
The published rider-height range is only a starting point. Two people of the same height may have different inseams, torso lengths, mobility, and preferred riding positions.
In addition to size, the bike must be able to support a rider’s weight. That’s usually not an issue. Most e-bikes can support up to 350-400 lbs. The problem arises when you add in clothes, accessories, and any cargo.
Measure Your Height, Inseam, Reach, and Mobility
Measure Your Height and Inseam
You’ll need two key measurements: height and inseam.
Height is relatively easy to measure. Just stand flat against a wall, feet together. Place a book on your head and step forward, holding the book firmly in place. Mark the underside of the book, and measure from the floor to the mark.
Measuring your inseam is a little more difficult.
1. Stand barefoot with your back against a wall.
2. Place a book firmly between your legs to represent the saddle.
3. Measure vertically from the floor to the top of the book.
4. Record the result in inches and centimeters.
The inseam provides more useful information about frame clearance and saddle position than height alone. It’s the difference between an e-bike you can easily get on and one that’s just too high.
Check Your Reach
Even if you can mount the bike successfully, you want the handlebars to be comfortable within reach. There’s no universal formula, as it depends on the cockpit geometry. The seat and handlebars are often adjustable, but you cannot go past the set mark.
Ideally, you want to squeeze the brakes without straining your shoulders or wrists. The elbow should be in a slightly bent, relaxed position. Too much tension can cause immense discomfort after miles of riding, so it’s best to get it right.
Consider Mobility and Confidence
Mobility isn’t always considered. But you’ve got to be able to get your leg over the frame. That can be difficult if you’ve got cargo on a rear rack, as you cannot swing your leg behind. The solution might be a step-through e-bike, which doesn’t have a top bar. As the name suggests, you can just step through the frame, making it perfect for stop-start riding.
The other issue is confidence. Do you feel confident controlling the bike’s weight, steering without any sudden movements, and riding the bike comfortably on the roads? If you feel precarious or suspect you might struggle, it’s not the right model for you.
Understand E-Bike Frame Size and Geometry
Frame Clearance and Access
Frame clearance relies on understanding a few specific measurements and frame styles.
· Standover height: The distance from the ground to the upper frame tube
· Step-through height: The clearance required to pass through the frame
· Step-over frame: A design requiring the rider to lift a leg over a higher tube
When the bike comes to a standstill, you’ll often find yourself hovering over the top bar. If it’s too high relative to your inseam, it can be quite uncomfortable. That’s not necessarily an issue if you’re primarily in the saddle. However, commuters often stop multiple times at intersections, creating a potential problem.
The solution is to swap the step-over for a step-through frame. These e-bikes can be otherwise identical. The main difference is simply that it eliminates the need to lift a leg over a higher tube. It’s a great option for riders with mobility issues.
Saddle Adjustment
Saddles are one of the most adjustable parts of the bike. You’ll want to compare the minimum and maximum saddle height, finding the sweet spot where your leg can move the pedals without hitting your knees or fully extending at the bottom.
Never raise the seat post beyond its maximum-extension marking.
Reach, Handlebars, and Riding Position
Like the saddle, the handlebars can be adjusted. You can compare:
· An upright position, which may reduce the amount of weight placed through the hands
· A forward position, which may suit more active riding but requires sufficient mobility and comfortable control access
Just raising the handlebars doesn’t necessarily change how the bike is designed to be ridden. Some e-bikes are designed for a more upright riding position, whereas others lean slightly forward.
How Wheel Size Affects Fit
Wheel size influences the frame proportions, obstacle rollover, and general handling. It does not determine rider fit itself. The e-bike frame size is the main factor for taller or smaller riders. A small-wheel bike can still have a tall saddle or long reach.
Calculate Total Payload, Not Rider Weight Alone
Rider Weight and Total Payload Are Different
One of the easiest mistakes is assuming that an e-bike’s weight limit only refers to the person riding it. In reality, manufacturers may provide two different figures.
The maximum rider weight is the heaviest rider permitted by the manufacturer. The total payload includes everything carried by the bike. That usually excludes the weight of the bike itself, although it’s worth checking how the manufacturer defines the term.
To calculate your total payload, use:
Total payload = rider + clothing and equipment + lock + bags + accessories + child seat and child + cargo
All those smaller items can add up surprisingly quickly. A heavy lock, panniers, groceries, or work equipment might take you much closer to the limit than expected.
Racks and baskets may also have their own limits. A bike might support 350 lb in total while its rear rack supports considerably less. You must remain below both figures rather than assuming the bike’s full payload can be placed on the rack.
Calculate Your Payload Margin
Once you know the complete load, you can calculate what remains:
Payload margin = published total capacity − calculated total payload
For example:
· Rider: 250 lb
· Clothing and equipment: 5 lb
· Lock: 8 lb
· Bags and accessories: 7 lb
· Cargo: 25 lb
· Total payload: 295 lb
A bike with a verified 350 lb capacity would therefore leave a 55 lb payload margin.
There’s no universal percentage you need to leave unused. The important point is that your complete load stays below the manufacturer’s verified limit, including on the days when you carry the most cargo.
A high payload rating doesn’t automatically mean the bike can carry another person. Any passenger or child seat must be explicitly approved for the frame or rack and remain within every relevant limit.
See our guide to electric bikes with a basket for more help choosing a practical cargo setup.
How Weight Changes Range, Hills, Braking, and Tires
Range and Battery Reserve
A heavier load generally requires more energy during acceleration and climbing. That extra weight might come from a heavier frame, bigger rider, or more cargo.
There isn’t a guaranteed reduction in range. As we explain in our guide to real-world e-bike range, how far you get out of the battery depends on speed, terrain, wind, temperature, assist level, and tire pressure.
It’s best to choose a battery with enough reserve to complete the normal route without depending on the maximum published range.
Hill Climbing
Hill climbing places greater strain on the motor and demands more energy from the battery. The overall strain depends on the complete load, gradient, climb length, battery charge, and the bike’s gearing.
Motor wattage alone cannot determine climbing ability. Our guide to how much e-bike motor power you need explains this in more detail. A higher peak output may provide additional power for brief periods, but it doesn’t tell you how effectively that power reaches the wheel. Look at torque as well, as rotational force plays a major role in starting and climbing. The gearing, controller, traction, and system temperature also matter.
If you’re a heavier rider, it’s sensible to choose a bike designed for your complete load, with adequate torque, gearing, and battery capacity, especially if you regularly ride on hills. See our guide to e-bikes for hills and heavier riders for more specific buying advice.
Braking and Tires
The additional load of a heavier rider makes the brakes work harder. The two main types are mechanical and hydraulic disc brakes. Hydraulic brakes don’t automatically guarantee a shorter stopping distance, but they generally require less hand pressure and provide more precise control. Actual braking also depends on the rotors, pads, tires, surface, and maintenance.
Fat tires can provide a more comfortable ride by adding cushioning and creating a wider contact patch. However, they do not increase the bike’s published payload capacity. They can also increase weight and rolling resistance, placing greater demand on the battery. Whatever tire type you choose, keep it within the manufacturer’s recommended pressure range.
The Rider Fit and Payload Worksheet
It can be difficult to juggle all the measurements in your memory, especially when you start comparing e-bikes. It’s helpful to write down your measurements, what you’ll need, and any other factors. You can then tick off whether a particular model matches or not.
Record Your Requirements
Start with your own measurements and practical needs rather than the specifications of a particular bike. Write down exact figures where possible. For things that can’t be measured easily, such as mounting confidence or preferred posture, record what you consider non-negotiable.
You can then complete the final columns for each model you’re considering:
|
Requirement |
Your measurement or need |
Candidate model |
Published specification |
Result |
|
Height |
|
|
|
Pass / Conditional / Reject |
|
Inseam |
|
|
|
|
|
Preferred riding posture |
|
|
|
|
|
Frame access or mobility needs |
|
|
|
|
|
Reach to handlebars and brakes |
|
|
|
|
|
Rider weight |
|
|
|
|
|
Fixed accessories |
|
|
|
|
|
Maximum regular cargo |
|
|
|
|
|
Total payload |
|
|
|
|
|
Payload margin |
|
|
|
|
|
Route distance, gradients, and surfaces |
|
|
|
|
|
Storage space and doorway width |
|
|
|
|
|
Stairs and maximum lifting weight |
|
|
|
|
|
Vehicle or bike-rack limit |
|
|
|
|
If a required specification isn’t published, write unverified rather than assuming the bike will be suitable. This makes it much easier to see which questions you need to ask the manufacturer before buying.
Calculate the Result
Determine your actual total payload. That doesn’t just mean your weight plus clothes. Think about the equipment you bring, any fixed accessories, and other cargo. Even if it’s only once a week, it still matters.
Then calculate the payload margin for each bike:
Payload margin = model capacity − total payload
Ideally, you’ll have a reasonable payload margin. Riding an e-bike at close to capacity is possible, but it can place extra strain on the motor, drain the battery, and make going uphill a struggle.
Alongside the other measurements, you can now determine whether the e-bike is right or not. Create three groups:
· Pass: The model meets the verified fit, payload, route, storage, and control requirements.
· Conditional: The model may work, but only if a particular condition is met, such as reducing cargo or avoiding stairs.
· Reject: The model fails a non-negotiable requirement or relies on an unverified specification.
Finding the right model is now much easier. You’re not comparing a dozen different specs. You can quickly see which bikes work or not, selecting the best of your shortlist.
Mounting, Stopping, and Low-Speed Control Test
Prepare the Bike
Don’t jump straight on a bike that’s just been delivered. You need to ensure it’s set up for you. Adjust the handlebars and saddle within their permitted markings. Confirm the tires are correctly inflated and check that both brakes work.
Complete the Test
Find a level, open area away from traffic for the test. Follow these instructions:
1. Mount the e-bike without pulling the display, cables, or brake hoses.
2. Reach both handlebars and squeeze the brake levers.
3. Start smoothly in a straight line.
4. Make a slow, tight turn in both directions before stopping under control.
5. Start again and stop on a slight incline.
That’s enough of a test to give you an idea of how the bike feels and performs. It’s also sensible to lift the bike if storage or transport requires lifting. You can test whether you can manage the weight yourself.
Signs the Bike Is Not a Suitable Fit
Treat these as failure signals:
· Inability to operate both brakes fully
· Knee or handlebar interference
· Loss of control during starting or stopping
· Inability to clear the frame safely
· Saddle or handlebar settings exceeding their markings
· Inability to walk or lift the bike when required
· Needing another person for an everyday maneuver the rider must perform alone
Match Frame Style to Rider Needs
It’s not just the size and weight capacity of the bike that matters. You’ll also need to consider the frame style, depending on how the bike is used. Think about how you’ll ride the bike, what terrain you’ll encounter, and whether you want the option of weekend riding.
Here’s a quick table to help you decide:
|
Frame style |
Main advantage |
Main limitation |
Often suits |
|
Step-through |
Easier mounting access |
May still be heavy or have a high saddle |
Frequent stops or limited hip mobility |
|
Step-over |
Conventional frame structure |
Requires greater mounting clearance |
Confident riders with suitable mobility |
|
Folding |
Requires less storage volume |
Folding does not mean lightweight |
Apartments, vehicles, and shared storage |
|
Fat-tire |
Wider contact patch and cushioning |
Added weight and rolling resistance |
Loose or uneven surfaces |
|
Commuter |
Road-focused equipment and posture |
Less suited to rough terrain |
Work, school, and everyday errands |
|
Trike |
No need to balance at a stop |
Wider, heavier, and different in turns |
Cargo use or riders wanting three wheels |
For more information, see our guide on three-wheel electric bikes for seniors and the differences between an electric trike and electric bike.
Transport and Storage Fit
An e-bike can fit your body perfectly and still be completely impractical. It also needs to fit inside your home, workplace, elevator, vehicle, or regular storage area. Before buying, measure the entire route the bike will take from the street to wherever you plan to keep it.
Record:
· Bike length, width, and handlebar width
· Complete folded dimensions, if applicable
· Bike weight
· Battery weight, if published
· Door and elevator dimensions
· Number, width, and shape of any stairs
· Vehicle trunk opening
· Vehicle-rack per-bike and total capacity
· Maximum weight you can safely lift
Removing the battery may make the bike easier to lift. However, only do so when the manual permits removal and explains how to handle, store, and reinstall it correctly. Even without the battery, many e-bikes remain considerably heavier than conventional bicycles.
A vehicle rack must support the bike’s actual weight. It isn’t enough for it to be described as a bicycle rack. Check its per-bike and total capacity, especially if you’re carrying two e-bikes. The tire width, wheelbase, frame shape, and attachment method must also be compatible.
The simplest rule is: If the bike cannot be stored, secured, or transported using the rider’s normal routine, it does not fit their life, even if it fits their body.
Frequently Asked Questions
What size e-bike do I need for my height?
Use the manufacturer’s rider-height range to create a shortlist. Your inseam, reach, saddle-adjustment range, frame access, and ability to reach the controls will determine whether a particular model actually fits.
How much payload margin do I need?
There’s no universal percentage. Your complete load must remain below the manufacturer’s verified payload capacity. Racks and baskets may have lower limits, so check them separately.
Do heavier riders get less e-bike range?
Usually, yes. Additional weight increases energy demand, particularly when accelerating or climbing. However, there’s no universal reduction because range also depends on speed, terrain, weather, tire pressure, and assistance level.
Are step-through e-bikes suitable for heavier riders?
Yes, provided the exact model supports the rider’s complete load and offers suitable fit and control. A step-through frame doesn’t automatically have a higher or lower capacity.
Do one-size e-bikes fit everyone?
No. “One size” simply means the manufacturer offers one frame size. It doesn’t guarantee suitable reach, saddle height, clearance, or control access for every rider.
Share:
Best Qlife E-Bikes Under $1,000 for Commuting and Weekend Riding
E-Bike Maintenance Checklist: Monthly and Annual Tasks