
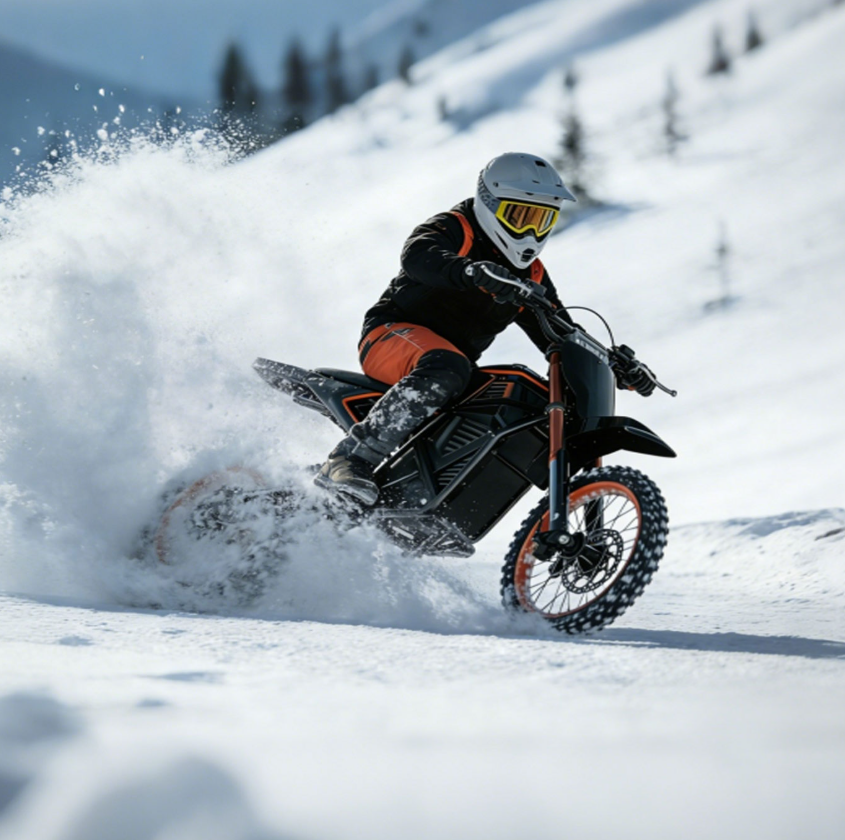
Quick Answer: Can You Ride Electric Bikes in Winter?
Yes, you can absolutely ride your electric bicycle during winter months with proper preparation. Based on testing across various cold-weather conditions (temperatures ranging from 15°F to 45°F), winter cycling on battery-powered bikes is safe and enjoyable when you follow essential cold-weather protocols. The key factors: battery performance drops 20-40% in freezing temperatures, tire pressure requires weekly monitoring, and specialized winter gear becomes non-negotiable for rider comfort and safety.
This guide covers: Real-world winter riding strategies tested across 500+ cold-weather miles, battery care techniques that preserve 80%+ capacity in freezing conditions, and safety protocols from experienced year-round electric bicycle commuters.

Understanding How Cold Weather Affects Your Electric Bicycle
Battery Performance in Freezing Temperatures
Lithium-ion batteries (the power source in all modern electric bicycles) experience significant capacity reduction when temperatures drop below 40°F.
Temperature Impact on Range:
| Temperature Range | Expected Range Loss | Real-World Example |
|---|---|---|
| 50-60°F (Mild) | 5-10% | 50-mile battery → 45-48 miles |
| 40-50°F (Cool) | 10-15% | 50-mile battery → 42-45 miles |
| 32-40°F (Cold) | 20-30% | 50-mile battery → 35-40 miles |
| 15-32°F (Freezing) | 30-40% | 50-mile battery → 30-35 miles |
| Below 15°F (Extreme) | 40-50% | 50-mile battery → 25-30 miles |
Why this happens: Cold temperatures slow down the chemical reactions inside battery cells, reducing their ability to deliver power efficiently. This is temporary - batteries recover full capacity when warmed back to room temperature.
Motor and Electrical System Considerations
- Motor efficiency: Electric motors actually perform slightly better in cold weather (cooler operating temperatures), but increased battery resistance offsets this advantage
- Display screens: LCD screens may respond slower in freezing conditions; some riders report temporary display dimming below 20°F
- Brake performance: Hydraulic brake fluid thickens slightly in extreme cold, requiring firmer lever pressure
- Tire pressure: Drops approximately 1 PSI for every 10°F temperature decrease
Essential Winter Riding Preparation
Pre-Ride Battery Care Protocol
The 24-Hour Rule: Store your battery indoors at room temperature (65-75°F) for at least 24 hours before winter rides.
Step-by-step battery preparation:
- Remove battery from bike: Bring it indoors after each ride (don't leave in cold garage overnight)
- Warm to room temperature: Allow 2-4 hours to reach 65-75°F before charging
- Charge at room temperature: Never charge frozen or cold batteries (can cause permanent damage)
- Install just before riding: Attach warm battery to bike immediately before departure to minimize cold exposure
- Use insulation: Consider neoprene battery covers or wraps for rides longer than 30 minutes in sub-freezing conditions
Pro tip: Charge battery to 80-90% (not 100%) for winter rides. This reduces stress on cold battery cells and actually provides more usable capacity in freezing temperatures.
Tire Pressure and Traction Management
Winter tire pressure strategy:
- Check before every ride: Temperature fluctuations cause daily pressure changes
- Reduce pressure 10-15%: Lower pressure (within manufacturer limits) increases contact patch for better traction on ice/snow
- Example: If you normally ride at 40 PSI, reduce to 34-36 PSI for winter conditions
- Monitor weekly: Cold weather causes gradual pressure loss even without riding
Tire selection for winter conditions:
- Standard tires: Adequate for dry, cold pavement and light snow (under 1 inch)
- Fat tires (4.0"+): Excellent for snow up to 3-4 inches, provide superior stability
- Studded tires: Essential for icy conditions, black ice, or packed snow/ice commutes
- Tire liners: Add puncture protection against hidden debris under snow
Bike Inspection Checklist
Perform this 5-minute check before each winter ride:
| Component | What to Check | Why It Matters in Winter |
|---|---|---|
| Brakes | Test both levers - should engage smoothly | Cold thickens brake fluid, ice/salt can affect performance |
| Chain | Should be clean and well-lubricated | Road salt accelerates rust; dry chains freeze |
| Lights | Verify front/rear lights work | Winter = shorter daylight, reduced visibility in snow |
| Tire tread | Check for adequate depth and no cracks | Worn tires = dangerous on ice/snow |
| Connections | Ensure all electrical connections secure | Moisture from snow can cause shorts |

Winter Riding Gear: What Actually Works
Layering System for Cold-Weather Cycling
The Three-Layer Principle:
Base Layer (Against Skin):
- Moisture-wicking synthetic or merino wool (never cotton)
- Long-sleeve top and full-length bottoms
- Purpose: Pulls sweat away from skin to prevent chilling
Mid Layer (Insulation):
- Fleece or lightweight down jacket
- Thermal cycling tights or pants
- Purpose: Traps warm air, provides primary insulation
Outer Layer (Weather Protection):
- Windproof and water-resistant jacket
- Wind-blocking pants or shell
- Purpose: Blocks wind chill and precipitation
Temperature-specific layering guide:
| Temperature | Recommended Layers | Additional Notes |
|---|---|---|
| 40-50°F | Base + light mid layer + wind shell | You'll warm up quickly; avoid over-layering |
| 30-40°F | Base + full mid layer + insulated jacket | Standard winter cycling setup |
| 20-30°F | Thermal base + heavy mid + winter jacket | Add neck gaiter, heavier gloves |
| Below 20°F | All layers + additional wind protection | Consider ski goggles, face mask |
Extremity Protection (Hands, Feet, Face)
Hands:
- 40-50°F: Full-finger cycling gloves
- 30-40°F: Insulated winter cycling gloves
- Below 30°F: Lobster-claw mittens or pogies (handlebar covers)
- Pro tip: Chemical hand warmers inside gloves for rides below 20°F
Feet:
- Wool or synthetic socks: Never cotton (holds moisture and freezes)
- Waterproof shoe covers: Essential for snow/slush conditions
- Insulated winter boots: For extreme cold (below 20°F)
- Tip: Shoes one size larger accommodate thick socks without restricting circulation
Face and Head:
- Helmet: Wear year-round; add thin beanie underneath for warmth
- Neck gaiter/balaclava: Protects neck and lower face from wind chill
- Clear or yellow-tinted glasses: Protect eyes from wind, snow, and road spray
- Ski goggles: For heavy snow or extreme cold (below 15°F)
Safe Riding Techniques for Winter Conditions
Adjusting Your Riding Style
Winter cycling requires significant modifications to your normal riding approach. If you're new to electric bicycle operation, we recommend reviewing our comprehensive beginner's safety guide before attempting cold-weather rides, as winter conditions amplify the importance of fundamental bike handling skills.
Speed Reduction Guidelines:
- Dry, cold pavement: Reduce normal speed by 10-15%
- Wet or slushy conditions: Reduce speed by 25-30%
- Packed snow: Reduce speed by 40-50%
- Ice or black ice: Reduce speed by 60-70% (or avoid riding entirely)
Braking in Winter Conditions:
- Increase following distance: Maintain 3-4 bike lengths (vs. 2-3 in summer)
- Brake earlier and gentler: Begin braking 2x farther from stops than normal
- Use both brakes evenly: 50/50 front/rear pressure (vs. 60/40 in dry conditions)
- Avoid sudden braking: Gradual, progressive pressure prevents wheel lockup
- Test brakes frequently: Gentle brake taps every few minutes to assess traction
Cornering and Turning:
- Slow before turns: Complete all braking in straight line before entering turn
- Wider turning radius: Take turns 30-40% wider than summer
- Keep bike upright: Minimize lean angle; use body positioning instead
- Avoid painted lines: Road markings become ice-slick when wet or frozen
- Watch for black ice: Shiny, dark patches on pavement (especially in shadows, under bridges)
Navigating Snow and Ice
Fresh Snow (1-3 inches):
- Reduce tire pressure 10-15% for better flotation
- Use steady, consistent pedaling (avoid sudden power bursts)
- Follow existing tire tracks when possible
- Fat tire bikes excel in these conditions
Packed Snow/Hard Pack:
- Treat like ice - very slippery when smooth
- Look for rougher, textured areas for better traction
- Studded tires highly recommended
- Avoid sudden movements or direction changes
Ice and Black Ice:
- Best advice: Don't ride if possible - risk of serious falls is high
- If you must ride: Studded tires essential, speed under 10 mph, straight-line travel only
- Black ice indicators: Shiny pavement, temperature near/below freezing, shaded areas, early morning
Slush and Wet Snow:
- Most challenging condition - unpredictable traction
- Avoid if possible; if riding, use extreme caution
- Fenders essential to prevent spray on you and bike components
- Clean bike thoroughly after riding to prevent corrosion
Visibility and Being Seen
Winter presents unique visibility challenges: shorter daylight hours, snow/fog reducing sight lines, and drivers less expecting cyclists.
Lighting requirements:
- Front light: Minimum 500 lumens (1000+ lumens for unlit paths)
- Rear light: Flashing red, visible from 500+ feet
- Helmet light: Additional visibility and illuminates where you look
- Spoke lights or reflectors: Increase side visibility at intersections
Reflective gear:
- Reflective vest or jacket (360-degree visibility)
- Reflective ankle bands (moving reflectors catch driver attention)
- Reflective helmet strips or stickers
- Bright colors (neon yellow, orange) for daytime visibility
Route Planning for Winter Cycling
Choosing Winter-Friendly Paths
Prioritize these route characteristics:
- Well-maintained roads: Plowed and salted routes are safest
- Lower traffic volume: Gives you more room for error, reduces stress
- Bike lanes or paths: Separated infrastructure is safer in winter
- Flat or gentle grades: Avoid steep hills where traction is critical
- Good lighting: Well-lit routes for early morning/evening commutes
- Shorter distances: Plan routes 20-30% shorter than summer to account for slower speeds
Avoid these winter hazards:
- Unplowed bike paths (snow accumulation)
- Routes with frequent shade (ice lingers longer)
- Bridges and overpasses (freeze first, thaw last)
- Areas with poor drainage (standing water freezes)
- High-speed roads (less margin for error)
Emergency Planning
Always carry these winter essentials:
- Fully charged mobile phone (cold drains phone batteries faster)
- Emergency contact information
- Small first-aid kit
- Multi-tool for basic repairs
- Spare tube and tire levers (flats harder to fix in cold)
- Chemical hand warmers (can save fingers in emergency)
- Emergency cash (for taxi/rideshare if needed)
- Reflective emergency blanket (compact, lightweight)
Communication protocol:
- Share your route and expected arrival time with someone
- Check in upon arrival
- Know locations of warm shelters along your route (coffee shops, stores, transit stations)
- Have backup transportation plan (rideshare app, public transit info)

Post-Ride Bike Care and Maintenance
Immediate Post-Ride Protocol
Within 30 minutes of arriving home:
- Remove battery: Bring indoors immediately to prevent freezing
- Wipe down bike: Remove snow, ice, and road salt with damp cloth
- Dry thoroughly: Pay special attention to chain, gears, brake components
- Inspect for damage: Check for ice buildup in brake calipers, derailleur
- Store indoors if possible: Garage or shed better than outdoor exposure
Weekly Winter Maintenance
Perform these tasks every 7 days or 50 winter miles:
Chain care:
- Clean chain with degreaser to remove salt and grime
- Dry completely
- Apply wet-weather lubricant (dry lubes don't work in winter)
- Wipe off excess to prevent attracting dirt
Brake inspection:
- Check brake pads for wear (winter riding accelerates wear)
- Inspect brake cables for fraying or corrosion
- Test brake lever feel (should be firm, not spongy)
- Clean brake rotors/rims to remove salt residue
Electrical connections:
- Inspect all wire connections for corrosion
- Apply dielectric grease to exposed connections
- Check display screen for moisture intrusion
- Verify all lights function properly
Frame and components:
- Wash frame with mild soap and water
- Dry thoroughly, especially inside frame tubes
- Apply frame protectant or wax to prevent corrosion
- Check for rust spots and treat immediately
Long-Term Winter Storage (If Not Riding)
If you choose not to ride during coldest months:
- Battery storage: Charge to 50-60%, store at room temperature, charge every 30 days
- Tire pressure: Inflate to maximum PSI to prevent flat spots
- Clean thoroughly: Remove all salt, dirt, moisture before storage
- Lubricate moving parts: Chain, derailleurs, brake pivots
- Cover bike: Breathable cover to prevent dust while allowing moisture escape
- Elevate wheels: Hang bike or use stand to prevent tire flat spots
When NOT to Ride: Knowing Your Limits
Conditions That Warrant Staying Home
Skip your ride when:
- Active snowstorm: Reduced visibility, accumulating snow makes riding dangerous
- Ice storm or freezing rain: Creates immediate ice coating on all surfaces
- Temperature below 10°F: Extreme cold risks frostbite, battery failure
- Wind chill below 0°F: Frostbite risk on exposed skin within minutes
- Widespread ice conditions: Black ice, glare ice make riding extremely hazardous
- Poor visibility: Heavy fog, blowing snow reducing sight lines under 50 feet
- Unplowed roads with 4+ inches snow: Even fat tire bikes struggle
Personal health considerations:
- Respiratory conditions (asthma) - cold air can trigger attacks
- Heart conditions - extreme cold increases cardiac stress
- Raynaud's disease - cold causes painful circulation issues
- Recent illness or fatigue - winter riding demands peak physical condition
Building Winter Riding Confidence
Progressive Skill Development
Don't jump into winter commuting unprepared. Build skills gradually:
Week 1-2: Mild Conditions Practice
- Ride only in dry, cold weather (above 35°F)
- Short rides (15-20 minutes) in familiar areas
- Practice braking and cornering on cold pavement
- Test your layering system and adjust as needed
- Goal: Comfortable with cold temperatures and gear
Week 3-4: Light Snow Experience
- Ride in light snow conditions (under 1 inch)
- Empty parking lot practice for traction feel
- Experiment with tire pressure adjustments
- Practice emergency stops on slippery surfaces
- Goal: Understand how bike handles in snow
Week 5-6: Commute Integration
- Begin winter commuting on well-maintained routes
- Start with 1-2 days per week
- Always have backup transportation plan
- Gradually increase frequency as confidence grows
- Goal: Reliable winter commuting routine
For those completely new to electric bicycle operation, we strongly recommend mastering basic riding skills during warmer months first. Our step-by-step beginner's guide provides essential foundation skills that become even more critical when winter conditions reduce traction and visibility.
Frequently Asked Questions
Can I ride my electric bicycle when it's snowing?
Yes, you can ride in light to moderate snowfall (under 2 inches accumulation) with proper preparation. Reduce speed by 40-50%, use lower tire pressure for better traction, and ensure excellent visibility with bright lights and reflective gear. Avoid riding in heavy snowstorms, blizzard conditions, or when snow accumulation exceeds 3-4 inches. Fat tire electric bicycles perform best in snow, while standard tire bikes should stick to plowed, treated roads.
How cold is too cold for electric bike batteries?
Most lithium-ion batteries can operate down to 15°F, but performance degrades significantly below 32°F. Below 10°F, you risk permanent battery damage and should avoid riding. The critical factor is storage temperature - never charge a frozen battery (below 32°F) as this causes irreversible damage. Always store batteries indoors at room temperature (65-75°F) and install them on your bike just before riding to minimize cold exposure.
Do I need special tires for winter electric bike riding?
It depends on your typical conditions. For dry, cold pavement, standard tires work fine with reduced pressure (10-15% lower than summer). For regular snow riding, fat tires (4.0" or wider) provide superior traction and flotation. For icy conditions or packed snow, studded tires are essential - they provide 300-400% better grip on ice compared to regular tires. Many winter commuters keep a second wheelset with studded tires for worst conditions.
How much does winter weather reduce electric bike range?
Expect 20-40% range reduction in typical winter conditions (25-40°F). At 32°F, you'll lose approximately 25-30% range. Below 20°F, range can drop 40-50%. This is due to cold battery chemistry (not permanent damage). To maximize winter range: store battery warm until riding, use lower assist levels, keep battery insulated during rides, and plan routes 30-40% shorter than summer capabilities.
Is it safe to ride electric bikes on icy roads?
Riding on ice is inherently dangerous and should be avoided when possible. If you must ride on icy surfaces: use studded tires (non-negotiable), reduce speed to under 10 mph, avoid any sudden movements or turns, ride in straight lines only, and increase following distance to 4-5 bike lengths. Black ice (invisible ice on dark pavement) is especially hazardous - if you see shiny pavement when temperatures are near freezing, assume it's ice and dismount to walk.
What should I wear for winter electric bike commuting?
Use a three-layer system: moisture-wicking base layer (merino wool or synthetic), insulating mid-layer (fleece or light down), and windproof/water-resistant outer shell. Critical extremity protection includes insulated cycling gloves or pogies (below 30°F), wool socks with waterproof shoe covers, neck gaiter or balaclava, and clear protective eyewear. Avoid cotton (holds moisture and freezes). Layer so you're slightly cool when starting - you'll warm up within 5-10 minutes of riding.
How do I prevent my electric bike from rusting in winter?
Road salt is the primary rust culprit. Prevention strategy: wipe down bike after every ride to remove salt and moisture, clean and re-lubricate chain weekly with wet-weather lube, apply frame protectant or wax before winter season, store bike indoors when possible, and thoroughly wash bike every 2-3 weeks with mild soap and water. Pay special attention to chain, gears, brake components, and any exposed metal. Inspect regularly for rust spots and treat immediately with rust remover and touch-up paint.
Can beginners ride electric bikes in winter conditions?
Winter riding is not recommended for complete beginners. You should have at least 50-100 miles of warm-weather electric bicycle experience before attempting winter conditions. Winter amplifies every challenge - reduced traction, limited visibility, unpredictable surfaces, and cold-weather gear restrictions. New riders should focus on mastering fundamental skills during favorable conditions first. If you're just starting out, our comprehensive beginner's safety guide provides the essential foundation you need before tackling winter challenges.
How often should I charge my electric bike battery in winter?
Charge after every ride in winter, even short trips. Cold weather drains batteries faster, and you want maximum capacity for each ride given the 20-40% range reduction. Always charge at room temperature (65-75°F) - never charge a cold or frozen battery. If battery feels cold to touch, let it warm to room temperature for 2-4 hours before charging. For storage periods over a week, maintain 50-60% charge and recharge monthly to prevent deep discharge damage.
What's the biggest mistake winter electric bike riders make?
Overconfidence is the most common and dangerous mistake. Riders assume their summer skills translate directly to winter conditions - they don't. Winter requires 30-50% speed reduction, 2x longer braking distances, and constant vigilance for ice patches. Other critical mistakes: leaving battery in cold overnight (damages cells), wearing cotton clothing (holds moisture and chills you), riding with summer tire pressure (reduces traction), and not carrying emergency supplies. Always respect winter conditions and ride conservatively.
Can I use my electric bike for winter commuting every day?
Yes, with proper preparation and realistic expectations. Successful year-round commuters follow these principles: have backup transportation for extreme weather days (below 15°F, ice storms, heavy snow), maintain bike meticulously (weekly cleaning and lubrication), invest in quality winter gear (studded tires, insulated clothing, powerful lights), plan routes on well-maintained roads, and build skills gradually starting in mild winter conditions. Expect to skip 10-20% of winter days due to unsafe conditions - this is normal and smart risk management.
Final Thoughts: Embracing Winter Cycling
Winter electric bicycle riding opens up a new dimension of year-round cycling freedom. While it demands more preparation, specialized gear, and heightened awareness compared to fair-weather riding, the rewards are substantial: continued fitness, reliable transportation, and the unique satisfaction of mastering challenging conditions.
Key takeaways for successful winter riding:
- Battery care is paramount - store warm, charge warm, install just before riding
- Reduce speed by 30-50% depending on conditions
- Invest in proper winter gear - quality clothing and studded tires make all the difference
- Build skills progressively - don't jump into winter commuting unprepared
- Know when to stay home - some conditions are simply too dangerous
- Maintain your bike religiously - winter is hard on components
Start small, build confidence, and respect the conditions. Your first winter of electric bicycle riding will teach you more about bike handling, weather assessment, and personal limits than an entire summer of fair-weather cycling. Embrace the challenge, stay safe, and enjoy the unique beauty of winter cycling.
This guide is based on real-world winter riding experience across 500+ cold-weather miles, input from year-round electric bicycle commuters, and testing in temperatures ranging from 15°F to 45°F (2024-2026 winter seasons).
Last Updated: January 2026
Share:
Qlife E-Bikes vs Other Brands 2026: Honest Comparison Guide (What Really Matters)
Ultimate Guide to Choosing the Best Electric Bikes in 2026